
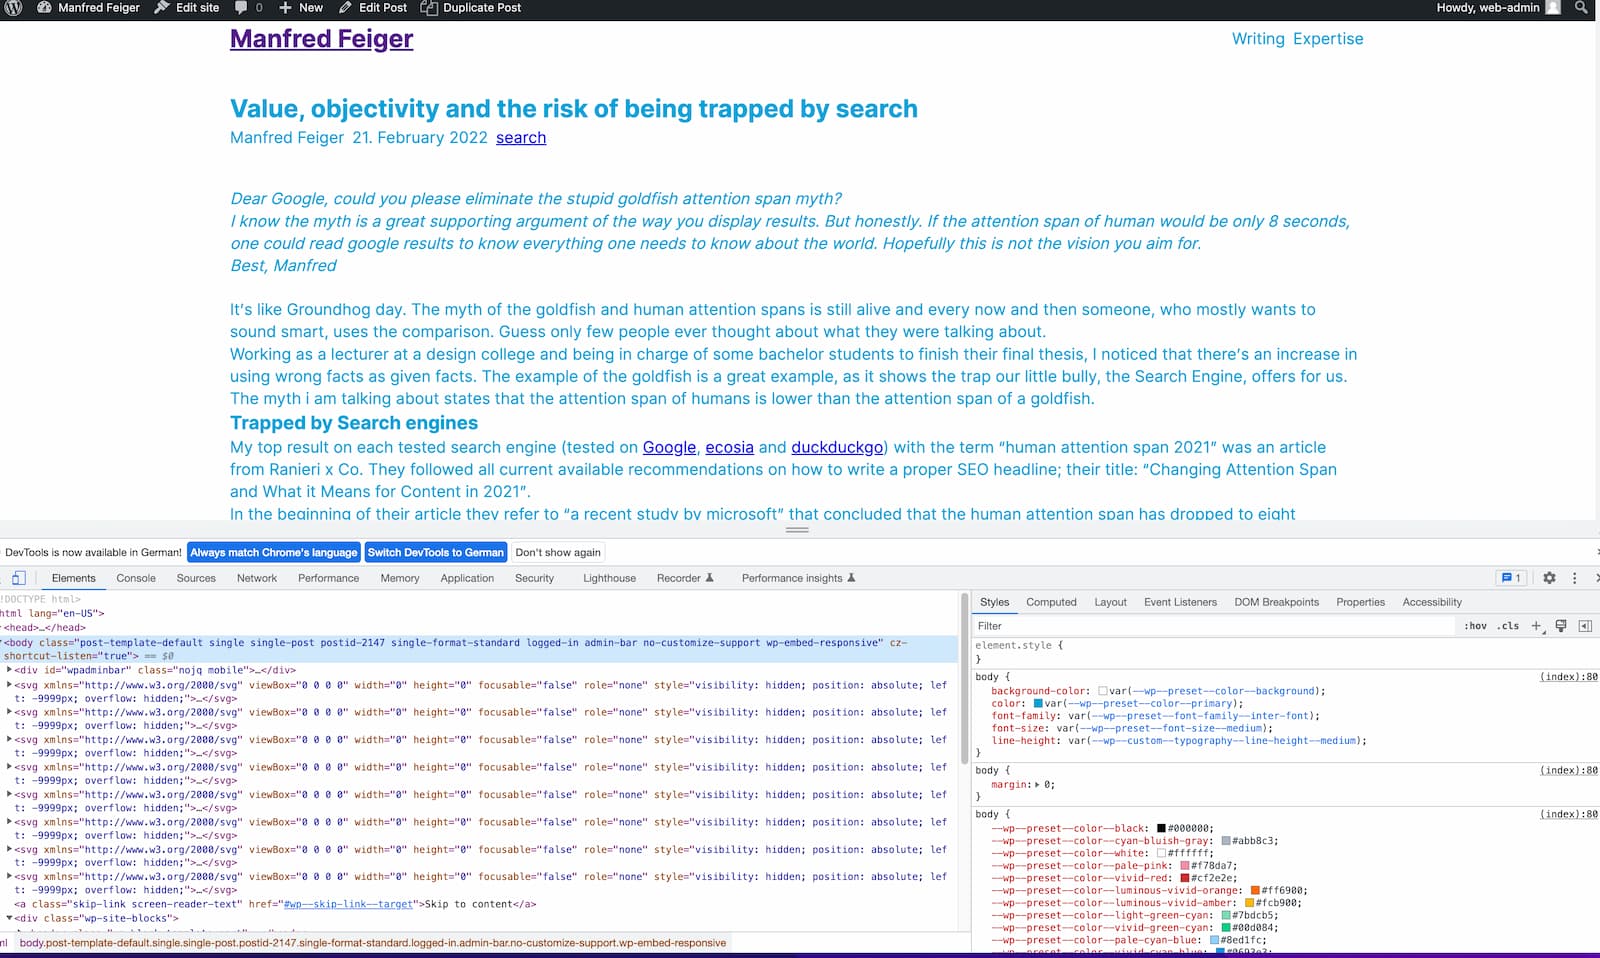
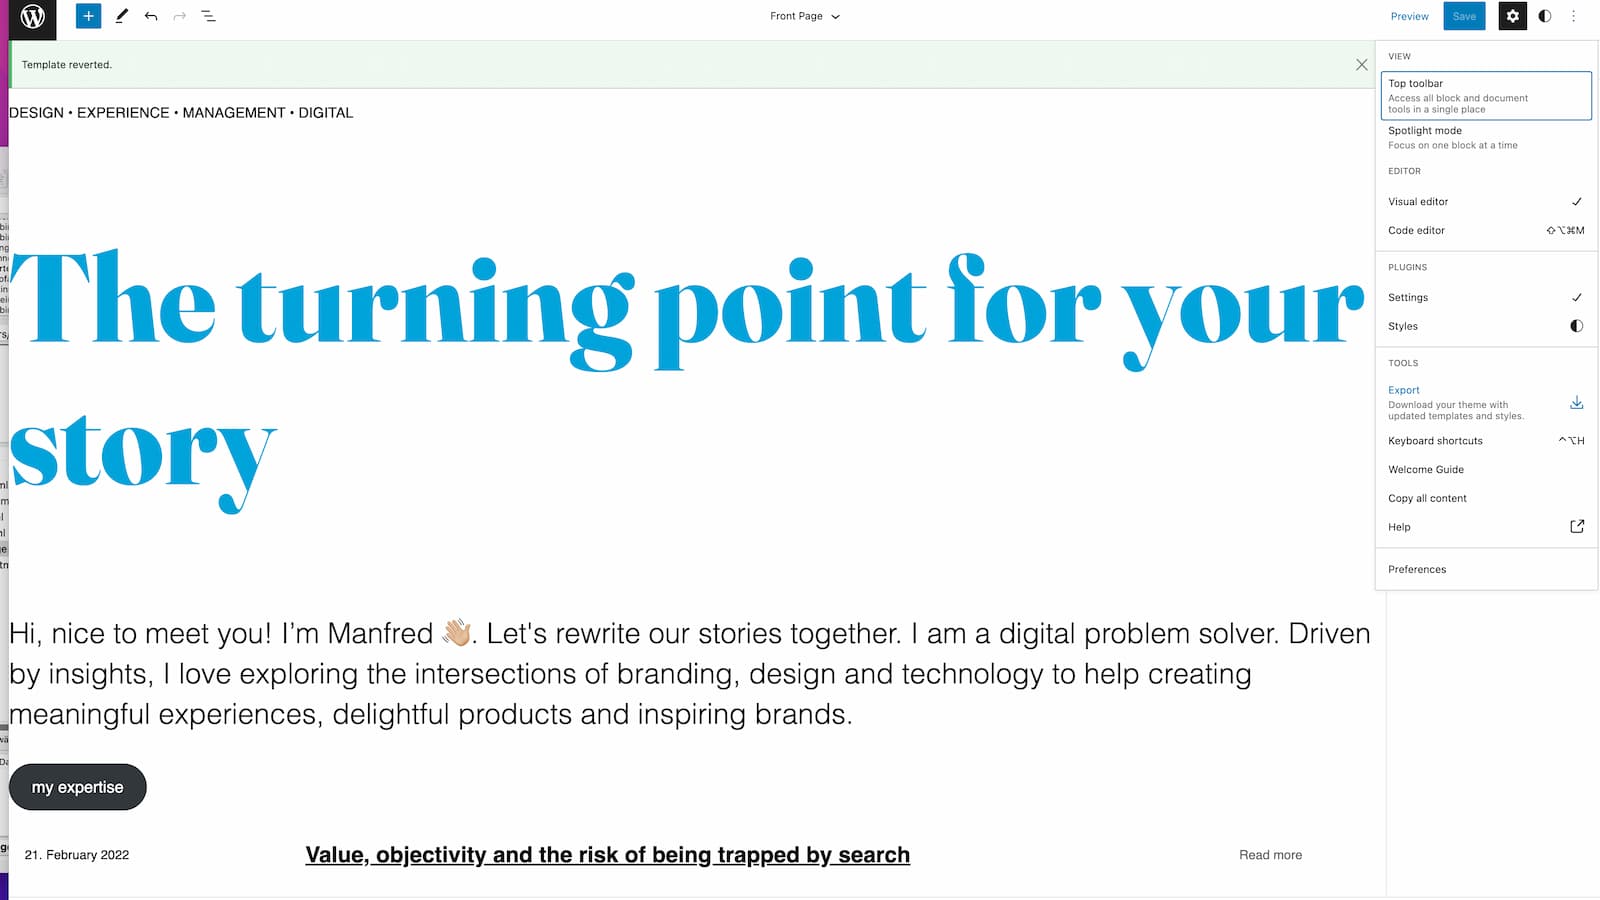
I have been playing around with the new Front Site Editor of WordPress since the beginning of the year. First, I recreated this page on my development environment to test about strength and weaknesses and therefore modified the existing twenty-twenty two theme.
Then I also created my beneficial project for this year. A new website for our kindergarten (including a member’s area). As it’s a parent initiative it takes a little while to finish it. If it’s done, I am happy to share the link.
Finally, I guess it’s time to write a little review and some recommendations. Therefore, I also start from scratch again, as WordPress 6 is now officially released.
For all, who are totally new to Web-Technology, I wouldn’t recommend my article. I focus on the WordPress part of it, so where you find certain elements to modify. So, I highly recommend a basic understanding of CSS and it is good if you ever modified a XML or JSON file before.
Initial steps to get an understanding of how block themes and the Front Site Editor (FSE) work
My initial step for this guide was googling for “WordPress 6 block based starter theme” and modifying the term a bit. My resume… I must write about it, as it is hard to find relevant articles at first. It’s better to search for the appropriate links on suitable platforms. One of those is for example Gutenberg Times. They curate articles around Gutenberg and they recently shared some Block Theme generators.
From my understanding of WordPress (not being a theme developer), being experienced with builders such as Elementor, Oxygen (Divi, Avada) and also starter themes (from the old WordPress World), such as _underscores, I thought starting with a block based theme builder is a good idea.
Finally, I will also be able to compare it with modifying an existing theme, such as the twenty twenty two, as I already used it to build the kindergarten website and to try my own site here. This site is currently build based on elementor.
In my point of view the fastest way to build WordPress Sites. But on the downside, you get a lot of code (that could be compressed to get a good rating for Lighthouse and other tests, but still you won’t be able to get great results, as the code is heavily nested) …. especially on mobile sticking with the WordPress Core will get you a more efficient site.
Nonetheless, if you read my article on “Stepping into digital sustainability”, the transfer cost for me, creating the website in the new block style way (at least for this site, as I use p5.js, variable fonts and other more tricky things, such as indieweb support and animated SVGs) exceed the cost of building it with WP Core. Though I will get better stats and a badge like website carbon will look even better, the work time and the energy being used, while creating exceeds the other cost for years (except my website will get 100 k hits a month).
Little Resume on WordPress 6 as of Mai 2022
Before you go into my little review, guide, I share my first impression:
- WordPress 6 has great potential. JSON for styling is cool and should allow other programs such as figma or even current builders new flows. Such as exporting Style-settings from figma directly to a JSON file, maybe accompanied with an export guide. Same for elementor or Oxygen… why not use elementor or oygen as a builder for setting up and the builder exports it to the native WordPress core. Oxygen already integrated JSON features in their 4.0 release.
- You might already guess it; I am not fully convinced yet. Builders are much stronger in terms of user friendliness and guidance. It’s also much easier to integrate basic things, such as JavaScript in the content area, to use Lottie files and play around with animations in general.
- The interface of the builder itself is kind of confusing at the moment. I don’t understand, why they don’t want to learn from other builders, whiter it be wixx, webflow, elementor or any other. If they would do some usability tests and see the distances the eye must move, they could improve their interfaces a lot.
- Currently I would be building Front-site editing sites mainly for personal blogs without too much style, animation, or mobile modifications.
Block Theme Generators
ThemeGen.App
My first contact with theme generators, was the generator by David Gwyer, called ThemeGen.App. For my test I liked it and I used it to get a better understanding about the structure of the JSON file, being essential for new WordPress Themes. The generator is fantastic and is a tool that should always be opened in a tab, as you could generate the JSON file in every detailed aspect.
For being new to the whole world of Front Site Editing (FSE), I wouldn’t use that one. But bookmark it, for the moment, you got a basic understanding of the structure to deepen your understanding about the JSON file.


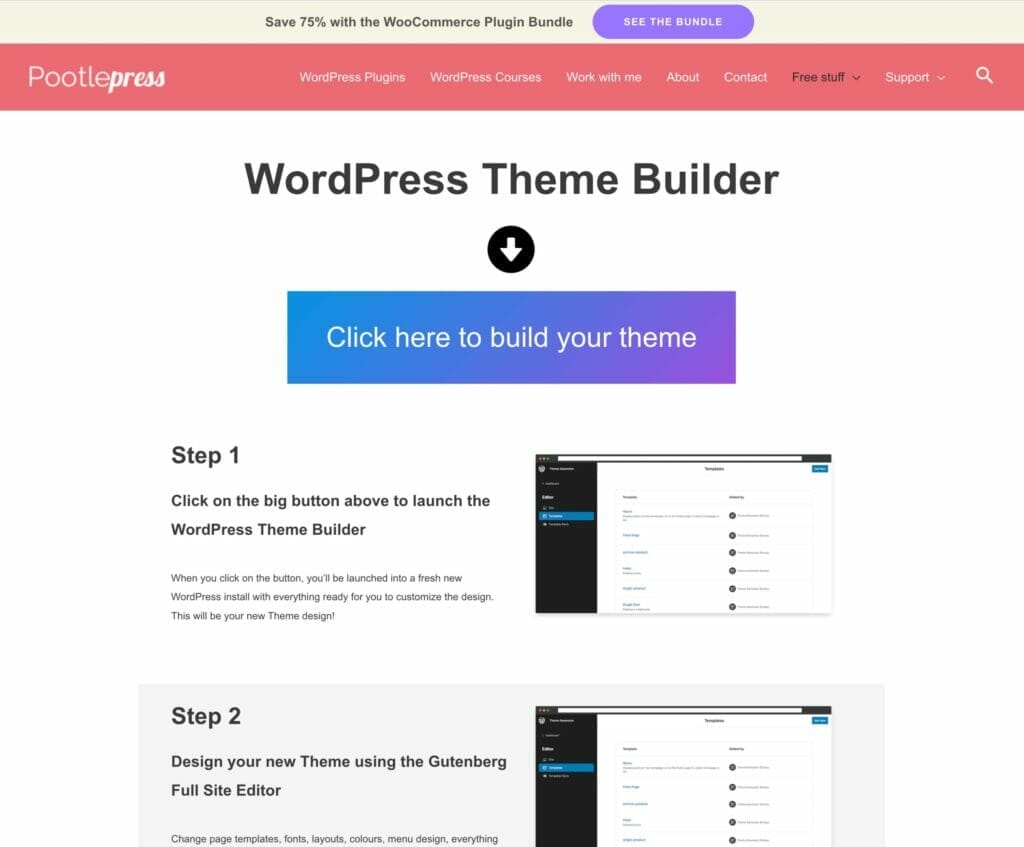
WordPress Theme Builder by Pottlepress
The next generator is a fun way to get a first understanding of how block themes work. Without the need to do any installation on your own server, you get a setup system from instawp and can build your theme in the WP environment itself and export it later.
So, no code is needed at all to create the theme. Here’s the “theme builder”.
There’s also a video on YouTube to follow along from Jamie Marsland. If you are new to WordPress 6, watch it and follow the simplified instructions on the theme builder site.

Fullsiteediting.com generator
For my article here, I tested the one from Carolina Nymark, she has provided an overview on Front Site Editing (FSE) at fullsiteediting.com.

When I use a generator or test anything on the net, I mostly quickly go for the button to execute, or in this case to generate, as I don’t like reading too much. Compared to the first generators I mentioned, at first sight, it seems, not as many colors are being offered.
Regarding Color options, you directly see, that the naming within elementor and the WordPress Generator are different. That wouldn’t be an issue for me, but the need to switch the color mode to copy type in a hex value drove me mad for at least 10 seconds (copying also didn’t seem possible for me while using chrome).


Unfortunately, the theme types “basic” and “advanced” both use GULP. In other words, some know how around GULP would be needed to go with the prebuild themes. So, I would recommend using this Generator only in empty state if you are not familiar with GULP.
As You might be able to see in the screenshot, I didn’t check all the gradients and duotone. Kind of a contemporary style element. Too many websites use gradients nowadays.
After typing in all values, one could generate a file to download.
In this case you download the file and upload it, as you did before for other themes in the “old” WordPress world.
If you are not familiar with the old way, log in to your WordPress as an administrator and go to > Appearance > Themes and click on the button, “add new”. Finally press the button “Upload Theme” and choose the ZIP file and press on “Install now”.
After installing, I would normally recommend going to the themes page, before activating to look at a live preview. In this case, the option is not available, so let’s activate the theme. As no Screenshot is available in the folder, you won’t see a picture:


After the activation, the site looks kind of ugly, like the one on the left. A starter theme has not too many styles, but also not too much clutter to get rid of.


To give you an understanding of how I already modified a twenty-twenty two theme, there’s a shot of the theme on the right, I already created before, based on a block theme.
The next steps I normally do, is checking a “naked” theme directly in lighthouse and check in the browsers console, if there are errors. In my case the result looks like this:

Ok to get started, but as mentioned before, please make sure you are using the Empty Theme to beginn. In my case I only need the basic page types and only a header and a footer. The tricky part, about my site are the details, such as variable fonts, animated SVGs and the integration of p5.js.
First steps in the Front Site Editor (FSE)
To get started, go to the site preview and you will notice that there’s a new button; the one for “edit site” give you access to the new Blocks World.

Afterwards, in my case I end up with the view to edit my existing site:


In my case, it looks kind of messy, as I already played around with the editor and as mentioned, had an elementor page before. For explaining the basic structure, it is good enough though.
The first step, I recommend. Always open the list view. It helps to have an overview of the current structure. And one great benefit about block themes is, that you are able to modify the header and the footer directly. This also gives you the interesting option, to combine WordPress 6 with the free elementor version (for handling the content).
For smaller websites, headers and footers are mostly easy. The more content pages you will have, to more complicated, it will get and you will have to go for custom menus anyway (they could also be a pain with a page builder, so strive for coding complex menu structures!).
The other element, you should familiarize now, are the button options at the top right.
Click on the styles icon to the top right.
In the styles option, you could modify some basic style settings. Feel free to play around, but as you might have noticed, there’s still a little “Beta” marker.
The last element, you need to know, is the drop down in the middle of the screen. As my homepage is of type “page”, I see a marker for page with an arrow to the bottom. Let’s open it:


By clicking on “Browser all templates” to see all available templates of the starter theme, we created.
In the left menu you could also switch to template parts (in our case a list of header and footer) and back to the site again (attention, you will go back to the view we had before).
By clicking on any of the templates, you will be guided to edit the template or at the top right you have the option to add a new template.


So, for example, let’s say, we want to create a template for the type of homepage (front page). And we will be guided to an empty screen., being able to edit the elements.
As recommended, always open the list view to the left and on the right, I would recommend switching to the settings icon.
Now, you are ready to fill the content with blocks. If we are speaking about a template for sites that are supposed to have different contents, you need a loop, such as the query loop. But that’s not important for now.
In my case, I want to recreate my homepage. To do so, let’s build it, ignoring Header and Footer first. If you never used WordPress Block Editor and are not familiar with other Tools, such as Notion, the way to access the content could be painful.


Start by typing “/” and you will be shown the “next best” options. if you want an overview of all options, click on the plus icon and the block inserter will open. Explore it on your own. There’s also a pattern library. In my case I am not the biggest friend of all pre generated templates (same applies for elementor or other page builders) … deleting all single values in editors’ kind of sucks. I prefer centralized management.
In my case, I quickly rebuild the basic structure of the homepage. Start with some text and just paste it. You could change the Content type, paragraph, or headline, also after copying the content; therefore, click on the icon of the block type; in the example I transform the paragraph to a headline.
And the headline gets transformed to a h3 (my other one before is a h2):


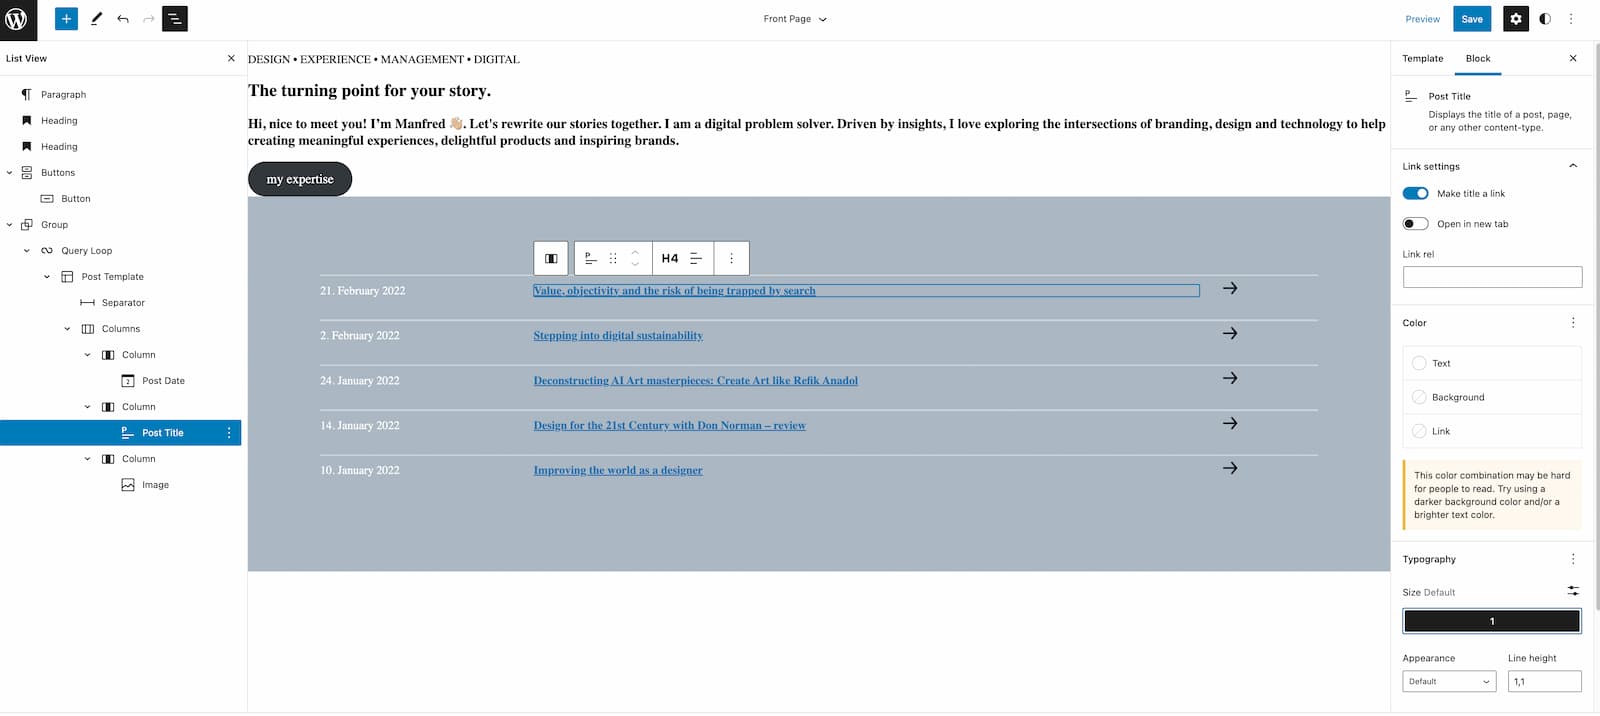
On my homepage we see an aggregation of the latest links, so this is a good example to use either “latest posts” or “query loop”. If you are not sure, what a type does, just try both. I went for the query one and chose an existing design block.
So, if I would look at my homepage now, it would look like this (no matter what kind of content of the real page would be, as we are creating a template for the homepage at the moment, it always overwrites each assigned page). In your case, I would assign an empty page as homepage with a good SEO title:


What we see now, is a partly styled element, as you see on shot before, the pattern has some own dedicated styling already. So, let’s modify 🙂
First, I delete my latest posts display as the Query loop is more customizable. Therefore I recommend always opening the left list view. You see, latest post is just one boxed element, that could be modified on the right. But the Query loop is a great tool to be modified by nesting elements.
Now it’s time to play with settings. For example, you could modify the amount of posts being displayed, by clicking on the settings icon. In this case it is really getting used to the Block editor and all the options. Play around and learn.


In my case for the query only a link icon would be missing. To add it I could add a column to the right and add a picture, by changing the background color to some greyish, I would also have the chance to see it (Also make sure the column width makes sense). In my preview, I end up now with this one:


One issue I am facing already, is how to link the icon next to the post text, with the same link. WordPress Plugins, such as toolset provide an option to influence the loop completely. For the moment I am writing this post, I won’t be able to do it via the block editor directly.
If you have some CSS know how, you might also already think about using some “after:” or “before:” modifications to get it going. So, to have the link in place, there’s one module, that is new to WordPress 6, it’s the “read more”. The next thing I change, is the size of the text and the headline type (in my case a h4). I had to reset the size, as I don’t like too many custom values:
For styling purposes, I could continue in the editor and style some more elements. But as I didn’t define basic things, such as a global typography or colors, I prefer a centralized way, to not mess up every single page in a different way.
So, let’s look at the file structure.
Block Based Themes – file structure
Let’s assume I want to continue with my little loop element or my homepage. Therefore, I would have a look at the code being generated:

For the spacing in the loop, I could see a variable being defined for the gap, called “—wp—style—block-gap”. Also, the Code structure reminds a bit more to elementor, as we have some weird numbers with wp-container-NUMBER and so on… so let’s look at the files.
Looking at the files, one would assume to look for the variable in the styles.css; but it’s not. The styles.css is quite empty. Only basic descriptions are included to show in your themes folder.

The Theme.JSON file
This is the new home of the magic. Opening it with some code editor such as visual studio code, you could search the file. The file being generated is empty. mostly we have spacers. Searching for gap, I end up finding the item “Blockgap”.
Changing the value to 10em, leads to this result (I uploaded the JSON file again and have overwritten the existing one!):


It’s working. So let’s look at the magic of this new file and add some colors and typography! First get rid of the test we did again and start at the top.
Now, we reached the moment, the other Theme generator “ThemeGen.App” gets quite useful, because there you have a visual interface for modifying the values in the JSON file, you could copy from. So, feel free to use it if you want as a supporting tool!
In the opened theme.json, I would first recommend to integrate following lines right after the first bracket (on top of the value "version"):
"$schema": "https://schemas.wp.org/trunk/theme.json",Don’t forget the comma!
By including this line, your program kind of knows the overall vocabulary and speaking about Visual studio code, you will get some guidance on the code on available words in namespace.
To get some more details on naming conventions, follow this link.
Colors
First, we add the basic colors. In my case, I add foreground, background, and three others. The naming of the elements is up to you. It’s more important to remember the names. The “slug” name will be important to use these elements as variables later again and should be familiar with anyone who has some experience with WordPress themes.
The variable name of my primary color would be as following:
--wp--preset--color--primary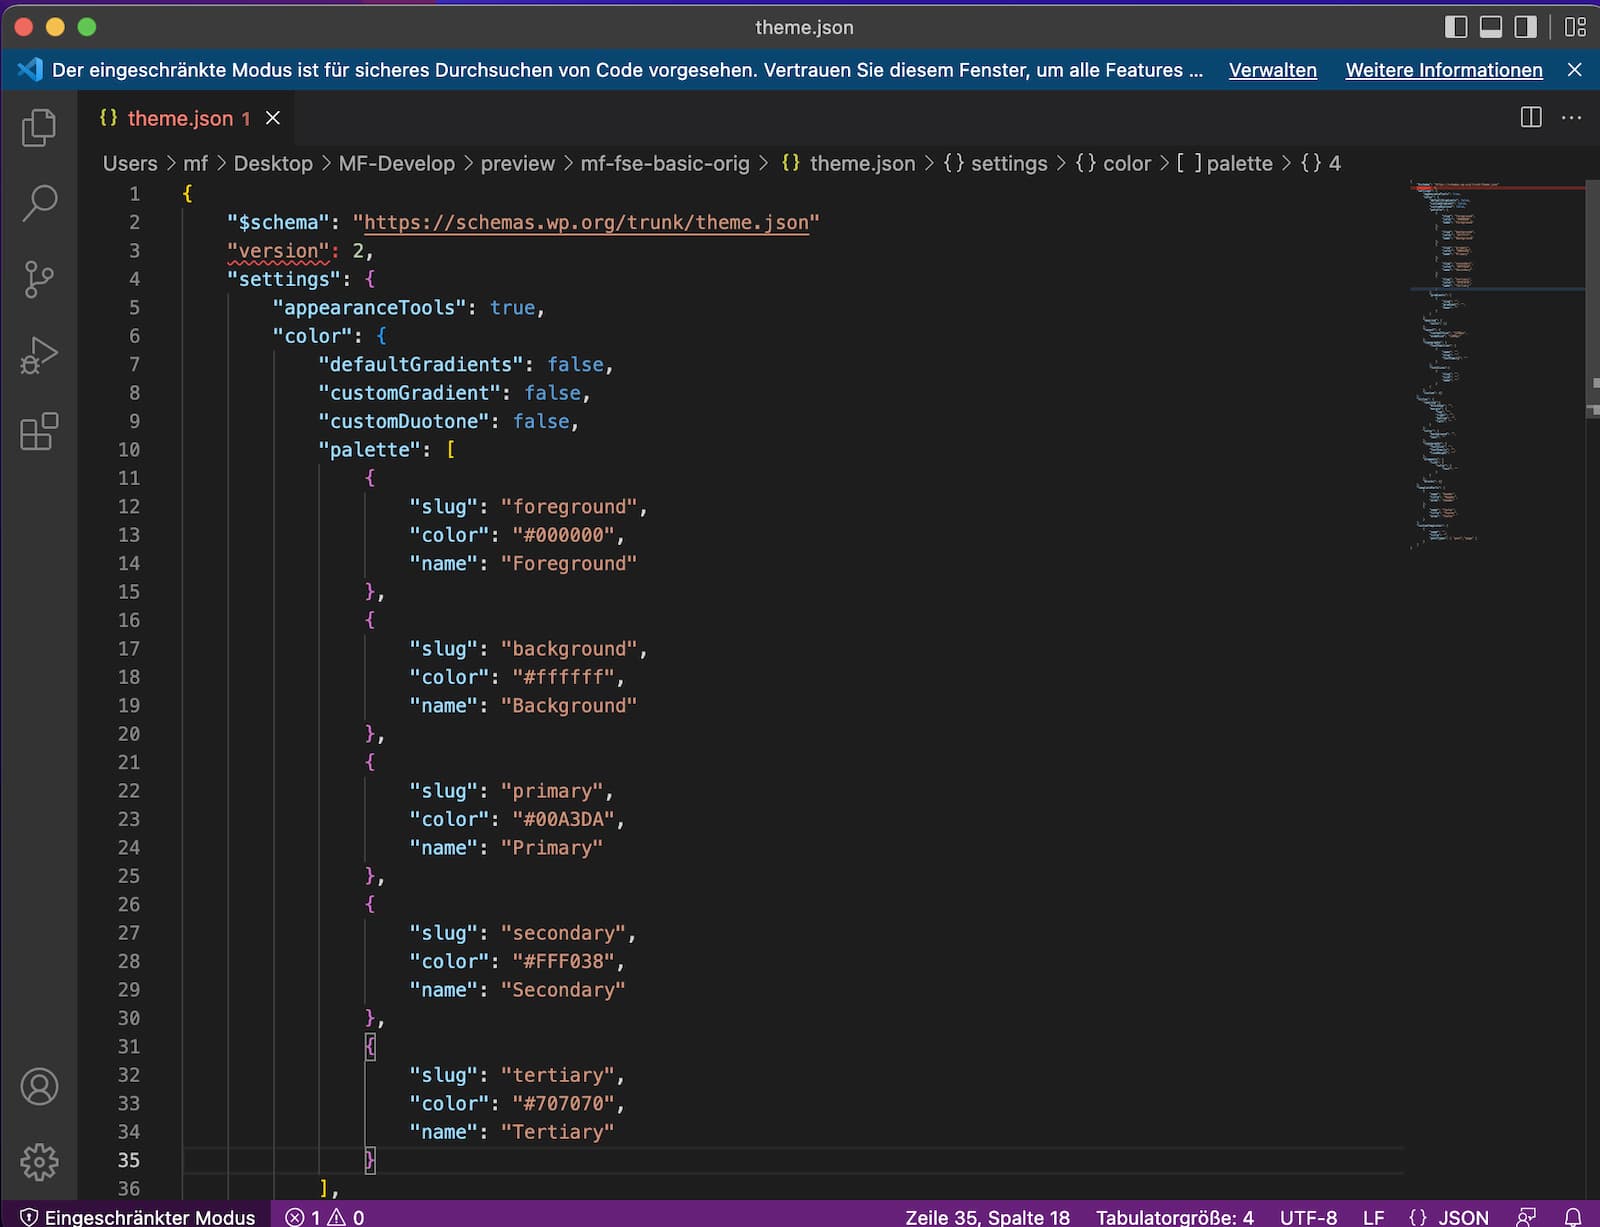
"color": {
			"palette": [
				{
					"slug": "foreground",
					"color": "#000000",
					"name": "Foreground"
				},
				{
					"slug": "background",
					"color": "#ffffff",
					"name": "Background"
				},
				{
					"slug": "primary",
					"color": "#00A3DA",
					"name": "Primary"
				},
				{
					"slug": "secondary",
					"color": "#FFF038",
					"name": "Secondary"
				},
				{
					"slug": "tertiary",
					"color": "#707070",
					"name": "Tertiary"
				}
			]
		},
The next element I would add are my fonts. In my case I use two variable font sets. The first step is a similar way to the colors, to add them directly to the JSON file:
"fontFamilies": [
				{
					"fontFamily": "\"Inter var\",-apple-system,BlinkMacSystemFont,Segoe UI,sans-serif",
					"name": "Inter Font",
					"slug": "inter-font"
				},
				{
					"fontFamily": "\"Fraunces\", serif",
					"name": "Fraunces Serif",
					"slug": "fraunces-font"
				}
			],
As my fonts are local (and subsetted to get better loading time), we need to place them in the themes folder.
Create a sub folder assets and one for fonts and copy your fonts to the folder. This is the way it should look like:

"fontFamilies": [
				{
					"fontFamily": "\"Inter var\",-apple-system,BlinkMacSystemFont,Segoe UI,sans-serif",
					"name": "Inter Font",
					"slug": "inter-font",
					"fontFace": [
						{
							"fontFamily": "Inter var",
							"fontWeight": "200 900",
							"fontStyle": "normal",
							"fontStretch": "normal",
							"src": [ "file:./assets/fonts/Inter-var.woff2" ]
						}
					]
				},
				{
					"fontFamily": "\"Fraunces\", serif",
					"name": "Fraunces Serif",
					"slug": "fraunces-font",
					"fontFace": [
						{
							"fontFamily": "Fraunces",
							"fontWeight": "300 900",
							"fontStyle": "normal",
							"fontStretch": "normal",
							"src": [ "file:./assets/fonts/Fraunces-latin.woff2" ]
						}
					]
				}
			],
So, now we did some definitions and need the application of the definition in terms of styles. Therefore, scroll down till you find the part “styles”…
This is the place, where you could assign values. To get used to writing with variables, try yourself:
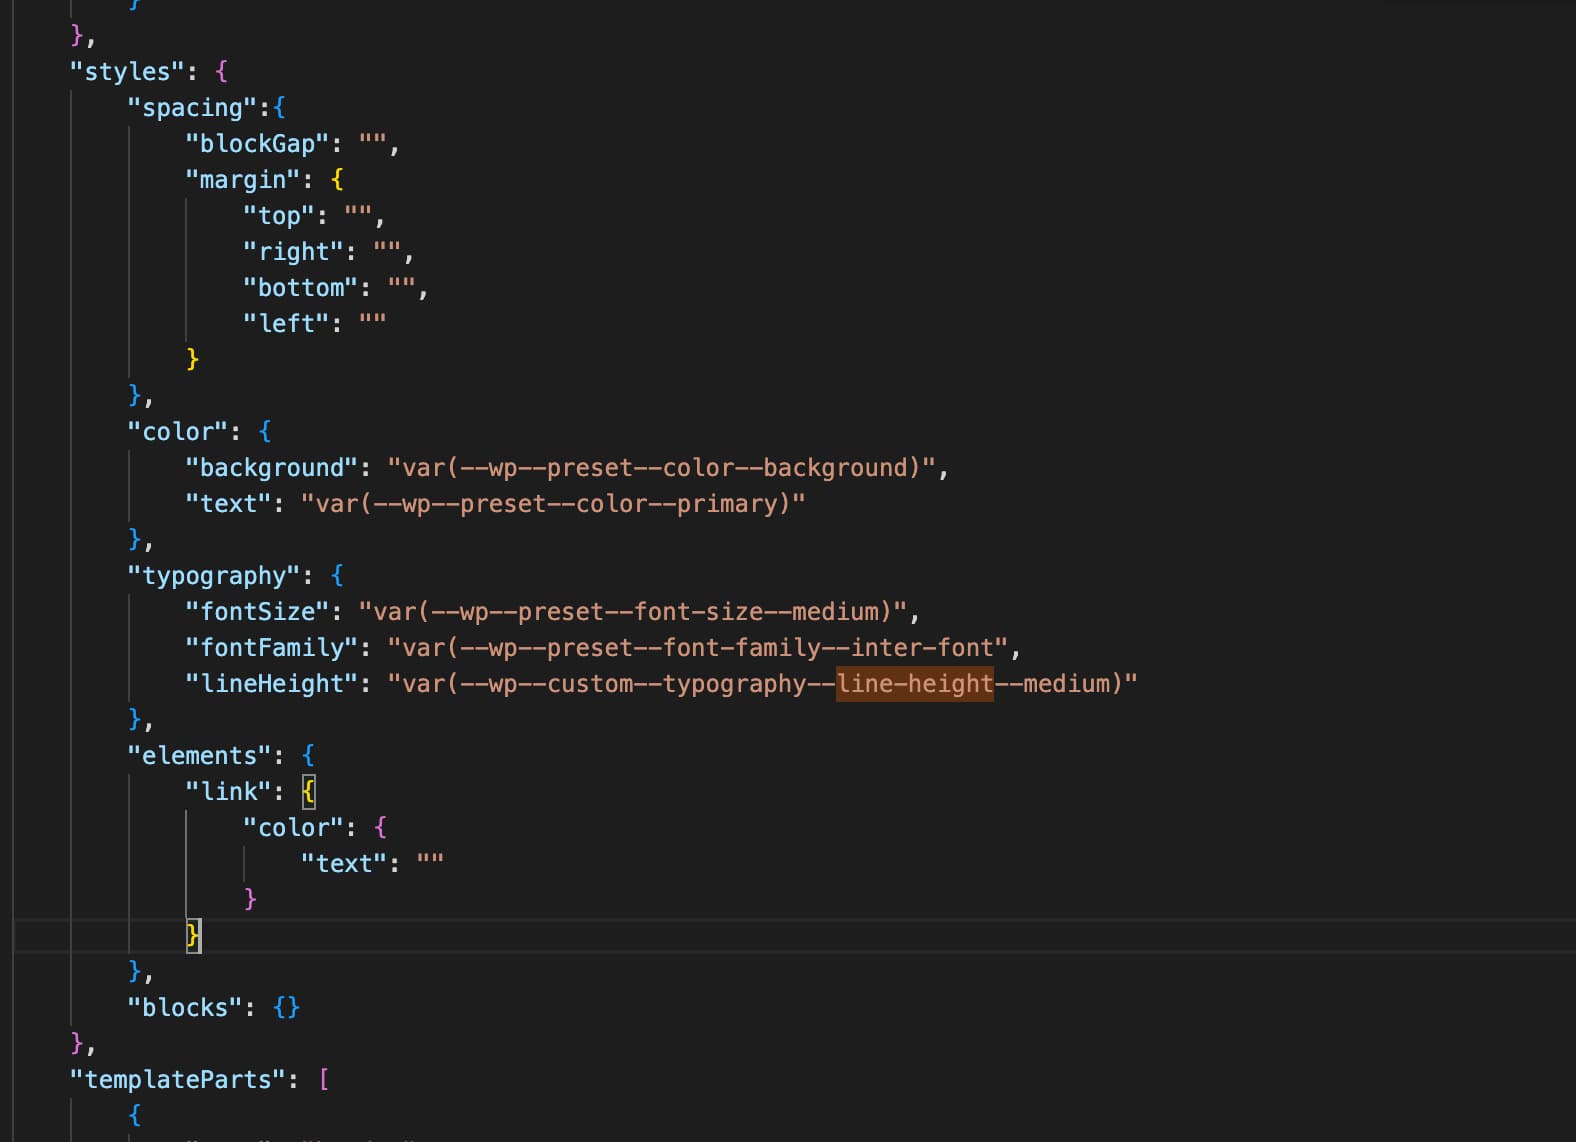
Remember to always upload your changed JSON file to the server. After refreshing a site on the test system, you could check for the changes. In my case, I see all the applied values from the previous screenshot in the source code of the site now:
If your changes are not applied, check your JSON file. It is very likely, that you missed a comma or some other sign (I also did :-)).
Back in the editor, you will also be able to apply the changed attributes. Such as typography or color… depending on which element you already defined. So on the one shot, you see that I am able to change the font-family (for the body in this case) and the other panel shows my new added theme colors.


Till that point, we mainly modified global attributes. To assign dedicated tyles to certain elements, such as headlines, we continue. By the way, that’s a similar process to elementor, if you follow the route in elementor (see picture on the left). In the new WordPress way, doing it in JSON, look for the headline “elements” and add more elements, such as links, headlines (see picture on the right):


Step by step, we get closer to the result, I want to achieve. But on the road, the first troubles come up. The first one I had, was the way to integrate a color for an element. You need to get used to the kind of writing of the code.
The other one I couldn’t fix till now is the treatment of the variable font settings; therefore, I would need the property “font-variation-settings”. Let’s say, I put those things to my personal backlog. First work along some pareto principle… strive for an 80% finished look. The last 20% will be a pain anyway and will cost you 80% of the total time… and that’s the reason, why there are experts. Doing a simple blog without special things could be easily done fast.


Another thing, before I end my first part on FSE Themes here, will be styles for block elements. As you see the theme.json, it’s also possible to add styles for blocks.
Luckily, we have our namespace connected, so we could start typing in the block and get available options you could style. In my case I style the post-date and change the color value, see on the right:


Finally, in the theme.json you see all the template parts and a spacer for custom Templates. nothing of importance for now.
One last thing that is quite nice. You can export your theme. Therefore, in the editor click on the three dots to the top right and in the following dialogue, you can export your theme (including our newly generated template for the front page and our JSON settings).
As somehow the JSON file is slightly modified, I tend to copy together a new theme to my folder. So, in the downloaded zip, in the templates folder, you find a html file you could add to your current setup and the system will recognize the new theme.
In the next step, I want to go for the templates. How to modify them and when there’s a need to edit them. I also change my header and footer.
If it helps, here's my little theme.json file, I created so far. I didn't fine tune much. To keep you following or to look for errors in your (or my) file, it should help.
Please also use the comment function. I am no WordPress developer, but create around four WordPress Pages a year. So here's another more recent example I did for Mooser Consulting, including Management, Consulting, design and the implementation.
I would be happy about feedback, as it is quite some extensive work to prepare such a tutorial; but hopefully you found some of the answers, you were already looking for. And if you got some tipps for me on working with variable fonts in the JSON document, feel free to help me, otherwise I have to mess around with the styles file.
Here are some recommended sources to keep you going:
- Tipps on handling the theme.json from fullsiteediting.com
- Look at the WordPress courses site
- Block Editor handbook
- Theme handbook
- Overview of what's new to WordPress 6
If you are one of the block editor haters, explore some magic that could be generated with the editor:
This Article was mentioned on manfred-feiger.com